Sometimes a project begins as a simple wish for more peace and beauty in your home, and before you realize it, that small wish turns into one of the most satisfying and elegant creations you have ever made. This build is exactly that kind of experience. The precision, the calm, the artistry, and the entire peaceful process behind this project feel completely different from normal furniture making.
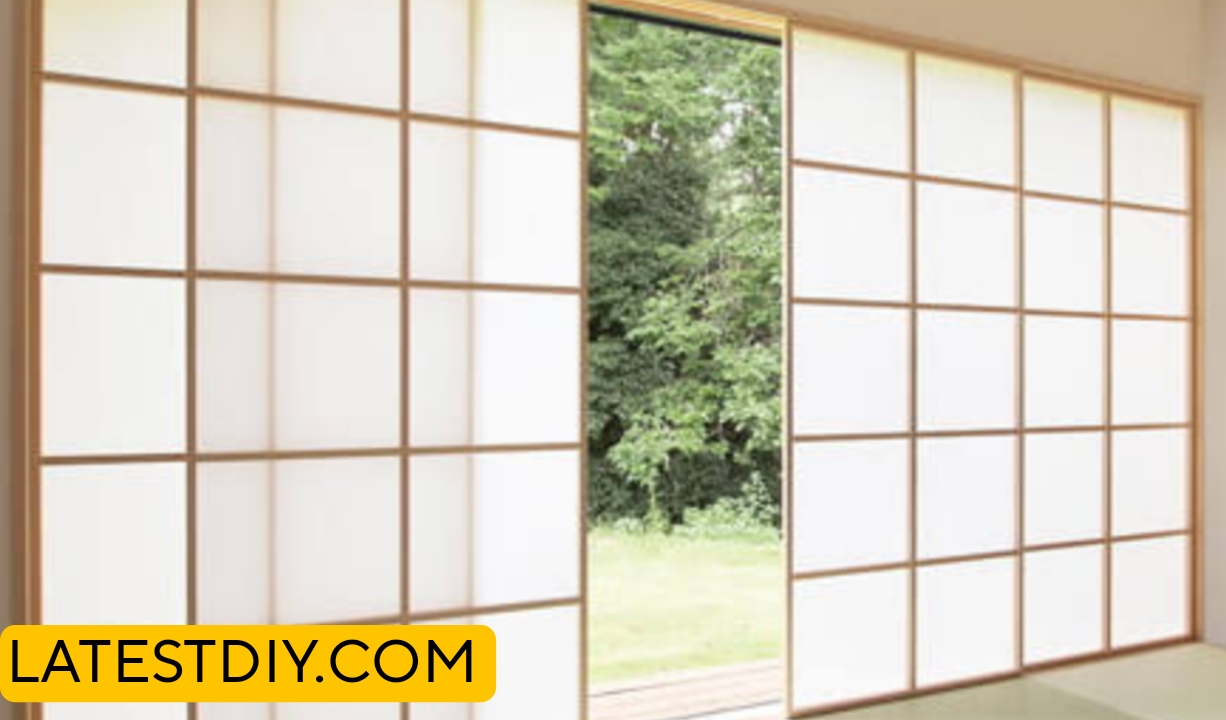
This project is not just another room divider. It is something far more special and far more meaningful. The goal here is to create a Japanese “Shoji” inspired room divider that brings the serene beauty of traditional Japanese architecture right into your modern home. Not a cheap plastic screen or heavy curtain, but a fully handcrafted wooden masterpiece with translucent panels that softly diffuses light while giving privacy and elegance.
Welcome to this complete journey of building your own DIY Japanese Shoji Inspired Room Divider.
Why I Decided to Build a Shoji Room Divider
In today’s busy world, our homes often feel open and chaotic. I wanted to create a gentle separation between spaces without making the room feel smaller or darker. That’s when I discovered the magic of Shoji screens.
Shoji screens are not just dividers — they are works of art. They control light beautifully, create privacy, and bring a sense of zen and calmness to any space. After seeing many expensive ready-made options online, I decided to build my own custom version that would be stronger, more beautiful, and much more personal.
Understanding Traditional Shoji Screens
Before picking up any tools, it was essential to understand the real history and purpose of Shoji.
Shoji screens originated in Japan over 1,000 years ago. They were first used as sliding doors and windows in traditional Japanese homes. The word “Shoji” means “to replace” or “to obstruct” in a gentle way.
The magic of Shoji lies in the translucent washi paper. It diffuses harsh sunlight into soft, glowing light that makes every room feel bigger, calmer, and more peaceful. At the same time, it gives visual privacy — you can see soft shadows and movement but not clear details.
For this DIY project, I chose a folding room divider style instead of sliding doors because it is more practical for modern homes. It can be moved easily, folded for storage, and used anywhere.
Materials and Tools I Used
Choosing the right materials was one of the most important decisions.
Wood:
- Premium pine for main frames (strong and affordable)
- Beech wood for lattice strips (smooth grain and beautiful color)
- Total wood used: Approximately 120 feet of lumber
Translucent Material:
- High-quality reinforced Shoji paper with fiberglass backing (tear-resistant and beautiful)
Other Supplies:
- Wood glue, screws, brass hinges, natural tung oil finish
- Sandpaper (80 to 220 grit)
Tools:
- Table saw, miter saw, Japanese pull saw, chisel set, clamps, CNC (for some decorative parts), measuring tools
Step-by-Step Building Process
Designing the Perfect Dimensions
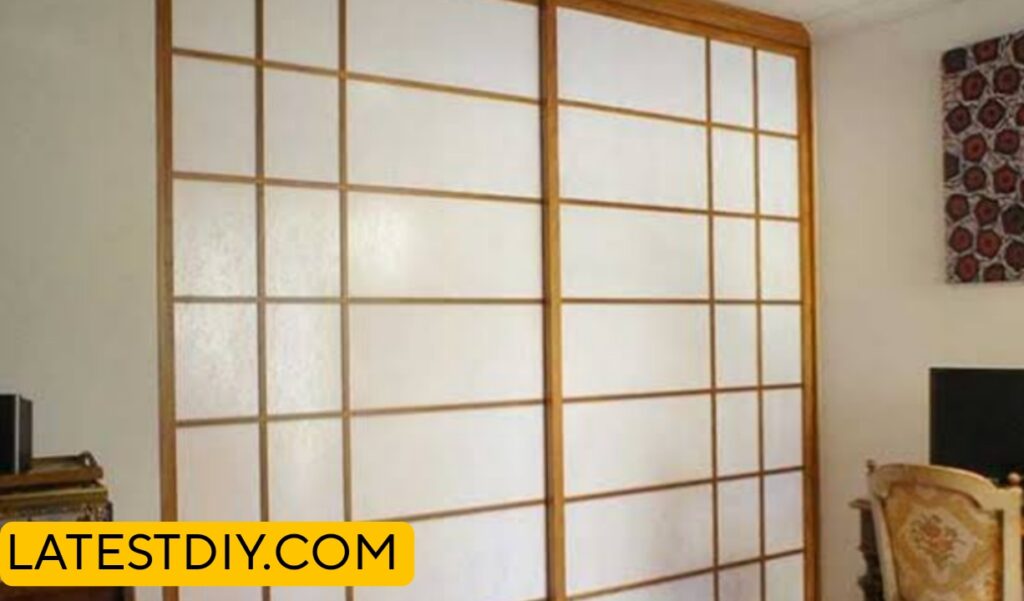
I measured my living room carefully. The final divider is 6 feet tall and expands to 8 feet wide when fully opened (4 panels × 2 feet each). This size gives excellent coverage while remaining easy to move.
Building the Outer Frames
Each panel needed strong outer frames. I cut:
- 8 vertical stiles (6 ft long)
- 8 horizontal rails (2 ft long)
I used mortise and tenon joinery for maximum strength. Cutting the mortises by hand took time, but the joints came out rock solid. After dry-fitting all four frames, I glued and clamped them overnight.
Creating the Beautiful Kumiko Lattice
This was the most artistic part of the entire project.
Kumiko is the delicate wooden lattice inside each frame. I chose a classic grid pattern with some diamond accents in the center panels.
I cut over 400 small wooden strips (½ inch × ¼ inch). Using a special half-lap jig on the table saw, I made perfect notches so every piece fit together like a puzzle.
Assembling the lattice was slow and meditative. I worked panel by panel, checking squareness after every row. When the first complete lattice was glued in place, it looked absolutely stunning.
Applying the Translucent Shoji Paper
This step felt truly magical.
I laid the reinforced paper on a large flat table. After lightly misting it with water, I placed the wooden frame on top and glued it carefully from the back using special Shoji glue.
As the paper dried, it tightened perfectly like a drum. Any tiny wrinkles disappeared with gentle heat. The soft glowing effect when light passed through it was better than I had imagined.
Adding Folding Mechanism
To make it a real room divider, I attached high-quality brass hinges between the four panels. I also added small wooden feet with felt pads so it stands stable and doesn’t scratch the floor.
Final Sanding and Finishing
I spent almost three full days sanding every surface to perfection. Then I applied three coats of natural tung oil. The wood glowed with a warm, rich color that beautifully complemented the translucent paper.
Testing the Room Divider
Before calling it complete, I tested the divider in real conditions:
- Light diffusion test (morning and evening light)
- Stability test (gentle pushing and moving)
- Privacy test (standing on both sides)
- Folding and unfolding 50 times
Everything performed beautifully. The paper stayed tight, the joints remained strong, and the whole piece moved smoothly.
Benefits of This DIY Shoji Room Divider
- Creates beautiful soft lighting in any room
- Gives privacy without making spaces feel closed
- Adds elegant Japanese zen aesthetic
- Highly customizable size and design
- Much cheaper than store-bought luxury versions
- Strong and durable for daily use
- Portable and easy to store
- Eco-friendly natural materials
- Boosts home value with handmade art piece
- Improves focus and calmness in work areas
Comparison Table: DIY Shoji vs Store-Bought Dividers
| Feature | DIY Shoji Divider | Store-Bought Dividers | Cheap Plastic Screens |
|---|---|---|---|
| Material Quality | Solid wood + real paper | Often MDF or plastic | Low quality plastic |
| Light Diffusion | Excellent soft glow | Average | Poor / none |
| Durability | Very high | Medium | Low |
| Customization | Fully custom | Limited | None |
| Cost | $180–250 | $400–1200 | $30–80 |
| Aesthetic Value | Premium handmade art | Mass produced | Basic |
| Weight | 35–40 lbs | Heavy | Very light |
| Repairability | Easy to repair | Difficult | Almost impossible |
Challenges I Faced During the Build
- Achieving perfect tight joints in lattice work
- Finding durable yet beautiful Shoji paper
- Keeping everything perfectly square during assembly
- Controlling wood movement with seasonal humidity
- Applying paper without wrinkles or bubbles
Every challenge taught me something new and made the final result even more satisfying.
(FAQ)
1. How much did the entire project cost?
The total cost was around $220 including all materials and finish.
2. Is this suitable for beginners?
Yes, if you have basic woodworking skills. The lattice work needs patience but is very doable.
3. Can I make it taller or wider?
Absolutely. You can easily adjust dimensions according to your space.
4. Does the paper tear easily?
I used reinforced paper with fiberglass backing. It is much stronger than traditional washi paper.
5. How do I clean it?
Gently dust with a soft brush or use a slightly damp microfiber cloth.
6. Can it be used as a permanent wall?
It works best as a movable divider. For permanent installation, sliding tracks can be added.
7. What wood is best for this project?
Pine, cedar, beech, or cypress all work great.
8. How long does the paper last?
With reinforced paper, it can easily last 8–10 years or more.
9. Is it heavy to move?
No, the complete 4-panel divider weighs only about 38 pounds.
10. Will you make a video or more designs?
Yes, more Shoji-inspired projects are planned.
Conclusion
This DIY Japanese Shoji Inspired Room Divider started as a simple desire for more beauty and calmness in my home. Through careful planning, patient craftsmanship, and many hours of focused work, it became one of my favorite projects ever.
It proves that you don’t need to spend thousands of dollars to bring elegance and zen into your living space. With good materials, proper techniques, and love for the craft, anyone can create something truly special.
Now when sunlight passes through the translucent panels and creates those soft glowing patterns on the floor, I feel a deep sense of satisfaction. This room divider is not just furniture — it is a piece of functional art that brings peace every single day.
If you have been thinking about creating something meaningful for your home, I highly encourage you to try building your own Shoji inspired divider. The journey is meditative, the challenges are rewarding, and the final result is something you will be proud of for many years.
Opinion
This project reminded me why I love woodworking so much. It is not always about making tables or chairs. Sometimes the most beautiful things come from trying something completely different — something artistic, something calm, and something that improves daily life. Turning simple wood and paper into a glowing piece of Japanese-inspired art was an incredibly fulfilling experience.
Education Disclaimer:
This article is for educational and informational purposes only. All projects involve tools and materials that can cause injury if proper safety precautions are not followed. Always wear appropriate safety gear, follow manufacturer instructions, and consult professionals when necessary. The author and publisher are not responsible for any injuries, damages, or losses that may occur while attempting to replicate this project.
I’m Shubham, a professional carpenter with 11 years of experience in the craft. I specialize in turning high-quality wood into custom furniture, durable cabinetry, and precise structural work. For me, woodworking isn’t just a job—it’s about building things that last a lifetime


