In today’s woodworking story I am taking the mystery out of building an Under-Desk Headphone Hanger with Integrated Cable Wrap. I am going to show you how you can turn regular pieces of wood into a clean, minimalist under-desk headphone hanger that holds your headphones perfectly while neatly wrapping and hiding the cables so everything stays organized and out of sight. The best part is it is a lot simpler than it looks. When customers or your friends see this under-desk headphone hanger with integrated cable wrap, they are amazed and they think that you are some sort of wood magician being able to create such a sleek, functional piece that solves two problems at once – headphone storage and cable management – without any messy wires hanging around. But now you know that it just requires time, patience, and a fun combination of beautiful hardwoods and smart simple design.
This project is perfect for any desk setup, whether it is a home office, gaming station, music workspace, or even a small studio. The under-desk mounting keeps your expensive headphones safely off the desk surface and away from dust or accidental knocks, while the integrated cable wrap keeps the long cables neatly coiled and hidden so your workspace looks tidy and professional. Customers often look under the desk, see the clean wooden hanger, and say, “That looks so simple yet so smart – how did you hide the cables so well?” That moment when they pull the headphones down and see the cables wrapped perfectly is pure magic.
I have built quite a few versions of this under-desk headphone hanger with integrated cable wrap, and every single time people are left wondering how such a small piece of wood can hold heavy headphones securely while managing cables so elegantly. Some think it must involve complicated mechanisms or expensive hardware, but the truth is you can do this with basic tools and careful planning. Today I am pulling back the curtain completely so you can create your own beautiful and practical hanger.
What started as ordinary boards slowly transforms into something unique and highly functional through careful cutting, patient assembly, precise shaping, and thoughtful finishing. By the end, you will have an under-desk headphone hanger with integrated cable wrap that not only keeps your headphones safe and organized but also turns your workspace into a cleaner, more professional-looking area that impresses everyone who sees it. So grab your favorite hardwoods, some basic tools, and let’s dive in. This is going to be satisfying and rewarding.
Why Build an Under-Desk Headphone Hanger with Integrated Cable Wrap
Before we jump into the actual building steps, let me tell you why I love this project so much. First, it solves real desk clutter. Headphones left on the desk take up space and get tangled, while cables always seem to dangle everywhere. This hanger fixes both problems in one clean piece. Second, it protects your investment. Good headphones are expensive – keeping them hanging safely under the desk prevents scratches, dust buildup, and accidental drops. Third, it looks minimalist and premium. The clean wood design blends into any modern desk without drawing too much attention, yet when someone notices it, they are impressed by how clever it is.
The combination of sturdy hanging arm, smooth curves, and the built-in cable wrap creates that wow factor. Customers see the simple wooden piece mounted under the desk and think it is just a basic hook, but when they discover the integrated cable wrap that neatly stores the cord, their reaction is priceless. That is the wood magician moment I enjoy every single time. And the best thing? It really is not as hard as it seems once you break it down step by step with patience and attention to detail.
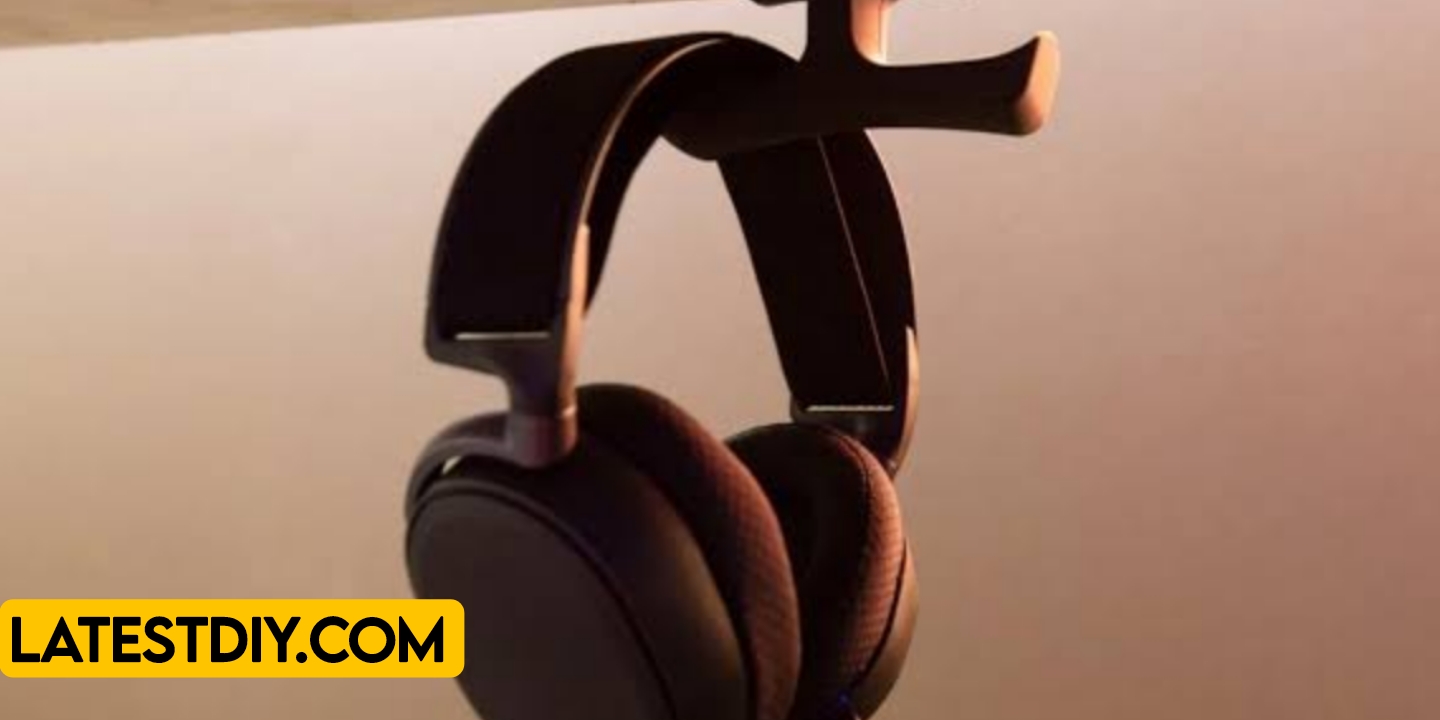
I recommend starting with at least three contrasting or complementary hardwoods. Walnut for rich dark tones, maple for light clean lines, and cherry or oak for warm accents. Using a combination gives subtle visual interest while keeping the overall design minimalist and professional.
Materials You Will Need
To build one Under-Desk Headphone Hanger with Integrated Cable Wrap sized to fit most over-ear headphones, here is exactly what I gather every time:
- Hardwood boards – walnut, hard maple, and cherry pieces measuring about five to six inches in width and roughly twelve to sixteen inches in length to start
- Wood glue – Titebond III because it is strong and has longer open time
- Sandpaper in grits from 80 up to 400 for that buttery smooth finish
- Danish oil or clear satin polyurethane for the final protective finish
- Heavy-duty under-desk mounting screws or brackets (I prefer hidden keyhole hangers or strong L-brackets)
- Felt pads or soft lining for the headphone contact points to prevent scratches
- Optional: small rare earth magnets for a secure yet easy-release hold on the cable wrap arm
Leave the boards as thick as possible at the beginning. You do not need to worry too much about little imperfections because chances are we are going to sand and shape them away later on. The goal is to create a hanger that is strong enough to hold the weight of headphones plus the wrapped cable without any flexing.
Preparing the Wood
I always start by making sure all my pieces are nice and flat on all sides – all four faces as well as the edges. Use a jointer or hand plane to get everything perfectly flat and square. Once the boards are prepared, we can begin cutting the main parts for the under-desk headphone hanger.
I cut strips from the different woods – a bunch of walnut strips, hard maple strips, and cherry. Having a variety of thin strips allows me to mix and match for subtle contrast that enhances the minimalist look without making it busy. Cut these strips as thin as possible first on the table saw and then run them through the drum sander to get them as thin and smooth as possible.
Having thin strips is important because when you start creating the curved hanger arm and the integrated cable wrap slot, the thin pieces allow for better bending control and smoother final surfaces.
Two Ways to Start the Under-Desk Headphone Hanger Project
There are two different ways that you can begin this project.
One way is to take one strip from two different woods and connect them together to form the base layer of the hanger arm. You can even add a second or third strip if you would like to create more visual interest. Even though it is straight right now, it is going to create a really cool effect once we get into shaping the curve and cable wrap.
The second way is to take two thicker boards of different colors and place them on top of each other temporarily using painters tape with some CA glue underneath. Then the boards are ready to go over on the band saw or table saw where we can cut a nice groove for the cable wrap and shape the outer profile.
Creating the First Curve and Cable Wrap Slot
I like to trace a gentle curve on the boards as a guide to follow for the headphone hanger arm. It does not have to be exact but it is helpful for knowing when to turn the board when you are on the band saw or with a jigsaw. Once you start the cut you want to commit to it. Do not stop halfway through. Just go with the flow and get a nice smooth curve even if it is a little different from what you drew.
With the first curve cut done, I gently sand the inside and outside before removing any temporary tape. Now comes the interesting part. The boards are flipped around and now we have two new pieces with contrasting woods ready for the next layer. Adding the cable wrap slot is where things get fun. I cut a simple channel or series of notches along the lower part of the arm where the cable can be neatly wrapped and tucked away.
Adding the Third Wood Piece and Strengthening
This is where things get really enjoyable. When you take a third piece of wood and place it to reinforce the hanger arm or form the mounting base, that is when the magic starts happening. The two opposite woods are placed on each side and the third strip goes in the middle for added strength. Glue is applied to both sides and then clamps are used to squeeze everything together firmly.
It is better to have a little bit too much glue than too little, especially on the load-bearing parts.
One thing to remember is that when creating bends and curves for the headphone hook, you actually need a longer piece of wood because the curve requires more distance to look natural and strong.
Glue Up Process
We are now ready to do the first major glue up. I am using one clamp setup for one section at a time because there is too much going on with the curves, cable wrap slot, and mounting base all together. Before gluing I made some marks in a few different places so that I remember the alignment perfectly.
Once glue is applied to both sides the reinforcing strip is placed in the middle and the clamps are tightened. During this process I use Titebond III because it is waterproof and it also has a longer opening time which is helpful for these trickier glue ups with curved pieces.
Before tightening the clamps completely it is important to check the alignment marks and make sure the cable wrap slot is still accessible and smooth. Once everything looks correct the clamps can be tightened fully and the assembly is left to dry for a full day.
Flattening and Refining the Surfaces
After removing the hanger from the clamps one important step is making sure that all outer surfaces and the curved arm are completely flat and smooth where needed. If the piece is not flat or if it feels uneven then it needs to be flattened before continuing.
The assembly can be taken over to a jointer to get one side nice and flat again. If a jointer is not available a drum sander or even a hand plane can be used carefully on the curves. Every time a curve or detail is added a little material needs to be removed in order to maintain clean smooth surfaces.
Adding More Refinements to the Cable Wrap
Once the first curve and basic cable wrap slot are done it becomes a personal decision whether to stop or continue adding more wraps or notches. The more times you repeat the refinement process the more elegant and secure the cable management becomes.
To create additional wrapping capacity the same steps are repeated – a new gentle curve or notch line is traced and the wood is cut again on the band saw or with a router. After cutting another reinforcing strip is inserted if needed and the pieces are glued and clamped again.
Because of drying time this whole process usually takes several days so plan your time and do not rush any stage.
Tips for Best Results
Tip number one start with the thickest boards that you can get and make one side flat before starting any shaping.
Tip number two have all of your clamps ready including a quick clamp because it makes glue ups much easier especially around the curved areas.
Tip number three cut the reinforcing strips and cable wrap parts longer than your main arm otherwise the final hanger will not be long enough for comfortable use.
Tip number four keep extra thin strips ready because they can break when you start shaping the curves or refining the cable notches.
Tip number five wipe off excess glue five to ten minutes after each glue up to keep the visible surfaces clean.
Tip number six use a minimum of three contrasting woods for the greatest visual effect while keeping the design minimalist.
Tip number seven do not rush. Each glue up and shaping step needs at least twenty four hours for drying before the next step.
Finishing the Under-Desk Headphone Hanger
After several curves, glue ups, and refinements the hanger begins to look complete. At this stage the piece is flattened again using a sander or planer so that all surfaces are smooth and straight where possible.
Once the surfaces are flat the edges can be rounded using a hand router or sanding block for a soft, comfortable feel that will not scratch your desk or headphones. The entire hanger is then sanded carefully progressing through finer grits until it becomes perfectly smooth to the touch.
The final step is applying oil or polyurethane to the wood which protects it and brings out the natural color and grain of the different woods. Multiple thin coats with light sanding between them give the best durable finish.
Benefits of the Under-Desk Headphone Hanger with Integrated Cable Wrap
| Benefit | Description |
|---|---|
| Space Saving | Under-desk mounting frees up valuable desk surface |
| Cable Management | Integrated wrap keeps long cables neatly coiled and hidden |
| Headphone Protection | Safe hanging prevents scratches, dust, and accidental damage |
| Clean Minimalist Look | Simple wood design looks professional in any workspace |
| Sturdy and Durable | Strong hardwood construction holds headphones securely |
| Easy Access | Quick grab-and-go when you need your headphones |
| Impressive Wow Factor | Customers think you are a wood magician when they see the cable solution |
Drawbacks to Consider
| Drawback | Description |
|---|---|
| Time Required | Multiple glue ups and drying times spread the build over several days |
| Precision Needed | Curves and cable wrap slot require careful measuring and cutting |
| Multiple Steps | Cutting, shaping, gluing, and finishing add layers of work |
| Mounting Care | Proper under-desk installation into solid wood or studs is important |
| Weight Limits | Designed for standard headphones – very heavy models may need extra support |
Frequently Asked Questions
What woods work best for an under-desk headphone hanger with integrated cable wrap
At least three contrasting hardwoods such as walnut, maple, and cherry work very well for subtle beauty and strength.
Why should boards be thick at the start
Thicker boards allow material removal during shaping and sanding while keeping the hanger strong enough to hold weight.
Why are thin strips used
Thin strips allow easier shaping of curves and create smoother surfaces for the cable wrap area.
Why must surfaces stay flat during assembly
A flat mounting base ensures the hanger sits securely under the desk without wobbling.
How long should glue dry
Glue should dry for about twenty four hours between major steps for full strength.
Can this hanger be adapted for different headphone sizes
Yes smaller or larger headphones can be accommodated by adjusting the curve and arm length.
Why keep extra wood strips ready
Strips can break or need shimming when shaping tight curves or refining the cable notches.
What creates the clean cable wrap function
The integrated notches or channel along the arm allow the cable to be neatly coiled and tucked away.
How many cable wraps or notches can be added
The process can be repeated a few times depending on how long your headphone cable is.
Why do customers like these hangers so much
Because the final piece looks simple and elegant but solves real desk clutter with smart cable management.
Can I add a magnetic hold for the headphones
Yes small rare earth magnets recessed into the arm give a secure yet easy release.
Is this project suitable for beginners
Yes if you take time with measurements, curves, and do not rush the glue ups.
What finish works best for daily use
Danish oil gives a natural look while satin polyurethane adds more scratch resistance.
How do I mount it securely under the desk
Use strong screws into solid wood or studs, or heavy duty keyhole hangers for hidden mounting.
Can I make it fully hidden from the front view
Yes by mounting it further back under the desk and keeping the design low profile.
Conclusion
After several careful cuts, patient glue ups, precise curve shaping, cable wrap refinements, multiple sanding sessions, and beautiful finishing, the regular pieces of wood slowly transform into a stunning under-desk headphone hanger with integrated cable wrap. What started as simple boards becomes something unique, practical, and artistic that improves your daily workspace.
Customers often look under the desk, see this wooden hanger, and they are amazed. They think that you are some sort of wood magician being able to create such a clean solution that holds headphones securely while hiding the messy cables completely. They pull the headphones down, unwrap the cable smoothly, and admire how tidy everything stays.
But the truth is that it just requires time, patience, and a fun combination of hardwoods, careful measurements, and smart design choices. Each step builds upon the previous one and when you follow them carefully with attention to detail, ordinary wood turns into an incredible functional accessory that makes your desk look and feel better every single day.
In my opinion, when people see this under-desk headphone hanger with integrated cable wrap, they often assume creating it must be extremely difficult. But once the process is understood, it becomes clear that the real secret is patience, preparation, and a thoughtful combination of woods and simple techniques. Regular boards can become beautiful, space-saving masterpieces when each step is followed one careful step at a time – from the first flat preparation to the final coat of protective finish.
This project gives you not only a practical solution for headphone storage and cable management but also that deep satisfying feeling of knowing you built something clever and useful with your own hands. The under-desk design keeps your workspace open and clean, the integrated cable wrap eliminates tangles, and the natural wood beauty adds warmth to any desk setup. So go ahead, gather your materials, measure your headphones and cable length carefully, and enjoy every part of the build. I promise when someone discovers your under-desk headphone hanger and sees how neatly the cable wraps, you will smile and feel exactly like the wood magician they think you are.
I’m Shubham, a professional carpenter with 11 years of experience in the craft. I specialize in turning high-quality wood into custom furniture, durable cabinetry, and precise structural work. For me, woodworking isn’t just a job—it’s about building things that last a lifetime


