When I first seriously started thinking that I need to build a workbench, I was automatically imagining that same traditional image that we all have seen, a heavy table with a thick top that stays permanently in one place, but as soon as I tried to fit that image into the context of my small apartment, I immediately started understanding that the problem is not the strength or design of the bench but the problem is its permanence, because an object that keeps occupying space all the time even when not in use actually becomes a new problem instead of being a solution.
And this was the point where I realized that maybe I don’t need to build a “better workbench” but I need to build a “different type of workbench” that only exists when I need it and leaves my space free the rest of the time, because in a small apartment flexibility is more valuable than any heavy-duty feature.
When I started exploring Japanese joinery, at first it felt like just an interesting traditional technique where pieces of wood are connected without screws or nails, but as I started understanding its logic, I realized that it is not just a technique but a complete mindset that works against permanence and gives priority to adaptability, because when you design wood in a way that it locks into itself, you don’t need external fasteners and it becomes possible to take apart and assemble the structure again without compromising its strength.
And that was exactly what I needed, because screws and nails make a structure strong but they also make it permanent, while joinery makes a structure not only strong but also flexible, which is the biggest advantage in a small space.
At this stage I did not have a perfect blueprint but I had some clear principles around which I needed to build, like the bench should be low-profile so that it does not look visually bulky, it should be easy to assemble and disassemble so that setup does not become a burden, and most importantly it should be simple enough that I use it regularly without feeling that setting it up every time is a separate project.
And one more thing that I consciously decided was that I will not make the design unnecessarily complex, because whenever something becomes overly complicated its usage naturally decreases, and my goal was to build a tool that improves my workflow instead of slowing it down.
Choosing the Wood
Now when you are building a structure where there are no screws or metal support, wood selection is no longer a normal decision but it becomes the foundation of the entire project, because here wood is not just a material but it is the element that will carry the load, hold the joints and maintain its integrity even after repeated assembly.
That is why I chose hardwood because its grain is tighter and it handles compression better, and when joints are tight fit, hardwood prevents them from getting loose over time which is a common problem in softwood, and here both consistency and durability were equally important.
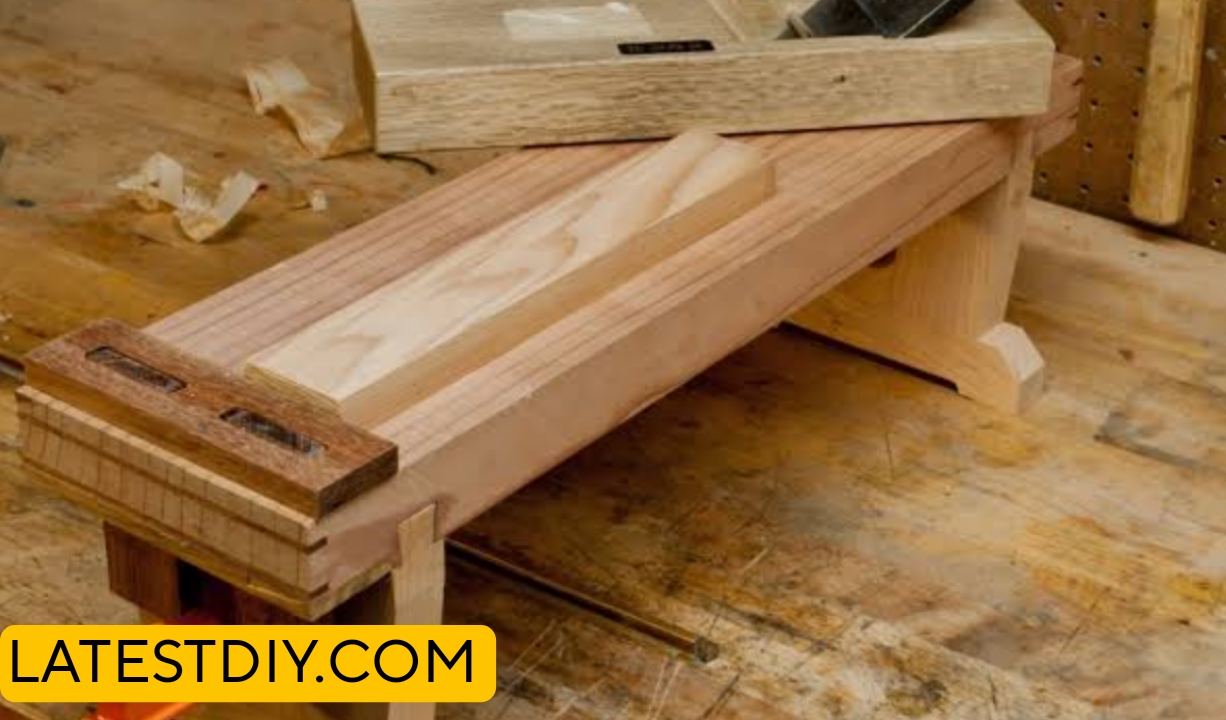
Cutting the Joints
When the actual cutting started, I immediately realized that this project is going to test patience because here you cannot work with speed and every cut has a direct impact on the final fit, and unlike normal woodworking where you can adjust small errors, in joinery every error becomes immediately visible and it affects not just appearance but also structural stability.
So every line has to be marked carefully, every cut has to be executed with control and every joint has to be tested before moving forward, and this repetitive process is what eventually creates a precise structure.
In this process the most important thing I learned was that a perfect joint does not come from measurement but from feel, because if the joint is too loose it will lose stability and if it is too tight it can damage the wood during assembly, so an ideal fit is where the piece slides smoothly but with a natural resistance that shows the connection is secure.
And this level of control only comes when you understand through multiple attempts how wood behaves and how small adjustments can drastically change the final outcome.
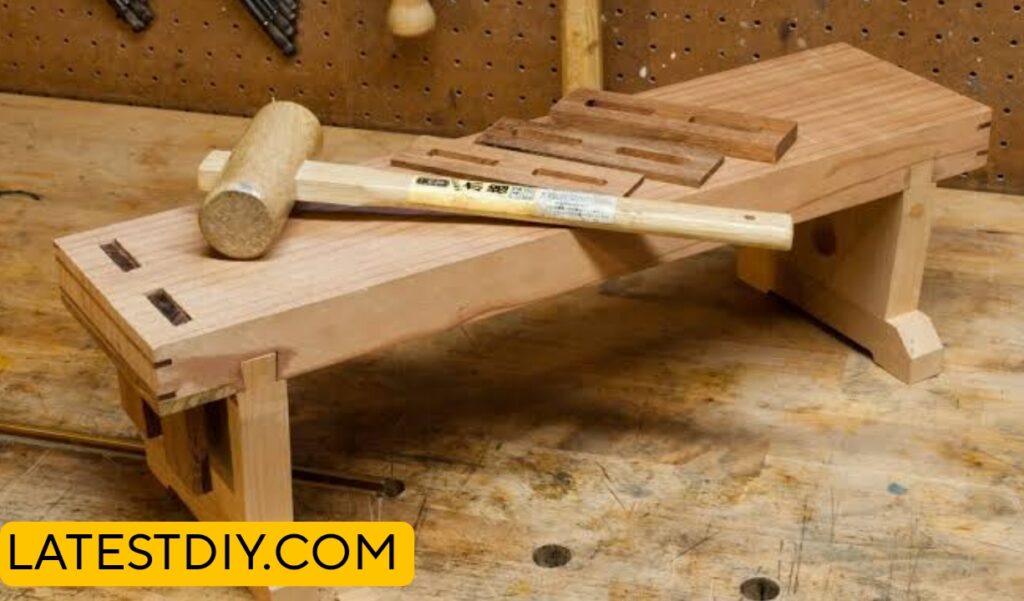
First Assembly
When I started assembling the full structure for the first time, it became clear that having correct individual joints is not enough but their alignment is equally important, because a small error in one joint can combine with others and make the whole structure uneven, and because of this I had to stop multiple times during assembly, adjust pieces again and assemble again.
This process was a bit slow but it ensured that the final structure is balanced and when the full bench is assembled it behaves like a solid unit instead of loosely connected parts.
Stability Without Screws
When the structure was finally assembled correctly, the most surprising thing was how stable it felt even without any screws, because the joint design naturally resists movement and distributes load evenly, which is a different approach from traditional fastener-based design but can be equally effective if executed properly.
And this realization was important because it proved that strength does not come only from hardware but also from design and precision.
Portability and Storage
The biggest advantage of this design is understood when you disassemble it after use, because that is the moment when you realize that it is not just a workbench but an adaptable system that can change according to your space, and when you store it in a compact form your room suddenly starts feeling open again.
And in small apartments this flexibility is what makes any design practical.
Surface and Finishing
When it comes to finishing, I intentionally kept things simple because this is a workbench whose primary purpose is functionality, so I made the surface smooth and durable without adding unnecessary layers that could make it slippery or overly polished, because a balanced finish is what maintains both usability and longevity.
The biggest benefit of this design is that it is specifically optimized for small spaces where every object needs to be flexible, and along with that it provides a strong and reliable surface without permanently occupying space, which makes it different and more practical than traditional workbenches.
Drawbacks
The biggest drawback of this build is that it requires both precision and patience, because in joinery mistakes are not easy to hide and fixing them takes time, so this is a project where focusing on accuracy is more important than speed.
FAQ
What is Japanese joinery
Japanese joinery is a woodworking technique where pieces of wood are connected through precise cuts without screws or nails, which makes the structure both strong and removable.
Is it strong without screws
Yes, if the joints are cut correctly the structure is quite stable because the load is distributed evenly and the connections lock tightly.
Can beginners build this
Beginners can try this but they will need patience and practice because accurate cutting is the most important part of this project.
Why use hardwood
Hardwood is better because it resists compression and keeps the joints tight for a long time.
Is it suitable for small apartments
Yes, this design is ideal for small spaces because it can be disassembled and stored easily.
Conclusion
If you live in a small apartment, the problem is not just space but how that space is used, and this Japanese joinery workbench solves that problem by giving you a strong workspace when you need it and freeing your space when you don’t.
I’m Shubham, a professional carpenter with 11 years of experience in the craft. I specialize in turning high-quality wood into custom furniture, durable cabinetry, and precise structural work. For me, woodworking isn’t just a job—it’s about building things that last a lifetime