
In today’s wood story I am taking the mystery out of weave boards and I am going to show you how you can turn regular boards into swirled masterpieces that will leave your customers wondering if you are some sort of wood magician. The best part is it is a lot simpler than it looks. When customers see these boards they are amazed and they think that you are some sort of wood magician being able to do this to wood. But now you know that it just requires time patience and a fun combination of woods.
To start these weaved boards I recommend that you start with at least three contrasting types of hardwood. I am going to start with pieces measuring about five inches in width and I will be using boards that are roughly two feet in length. If your boards are smaller it really does not matter.
For these boards that we are making there are a few things that I recommend that you do to save yourself some frustration. When you prepare your boards regardless of what type of wood you want to use leave them as thick as possible. You do not need to worry too much about little imperfections because chances are we are going to cut it away later on.
So essentially what I started by doing in order to prep my wood is I made sure that all my pieces are nice and flat on all sides. All four sides as well as on the edges. Once the boards are prepared we can begin cutting strips from the different woods.
Preparing the Wood
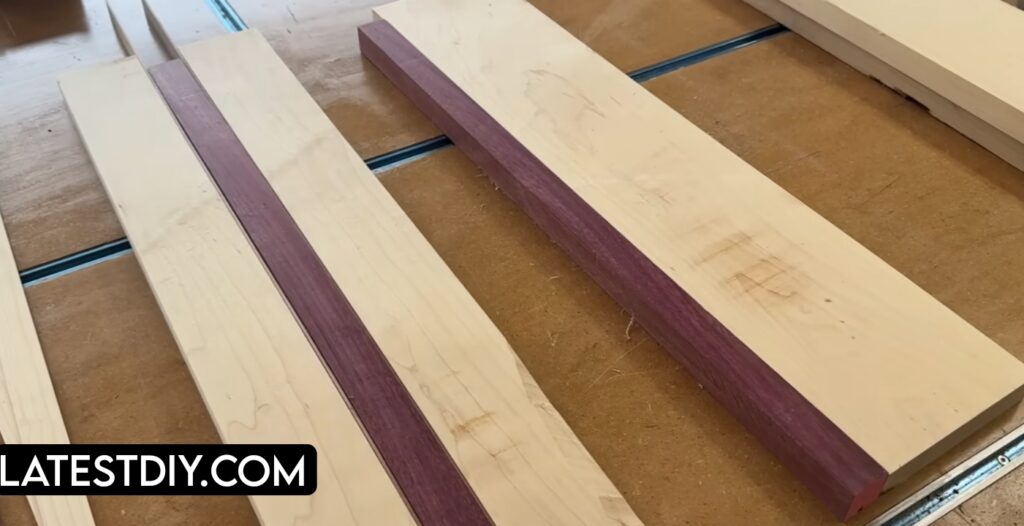
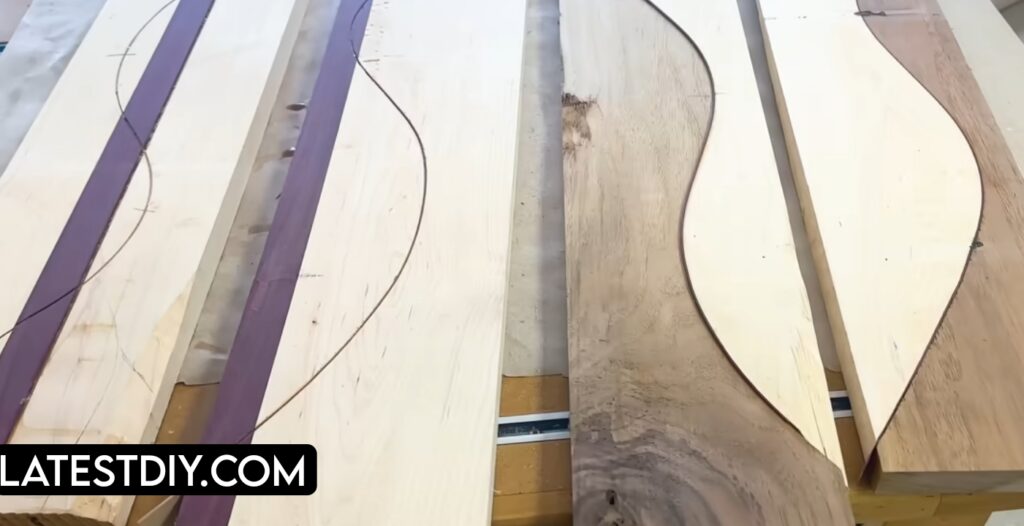
I have cut some strips from all of these boards. I cut a bunch of walnut strips and I also cut a bunch of hard maple strips and purple heart. Having a variety of thin strips will allow you to mix and match for a further cool effect.
You will need to cut these strips as thin as possible. I usually cut them first on my table saw and then I run them through my drum sander to get them as thin as possible.
Having thin strips is important because when you start creating curves and waves the thin strips will bend easier and create a smoother pattern.
Two Ways to Start the Project
There are two different ways that you can start this project.
One way is you can start by taking one of your strips in two different woods and you can connect them together. You can even add a second one if you would like and you can start creating some interest. Even though it is straight right now it is going to create a really cool effect once we get into the actual project.
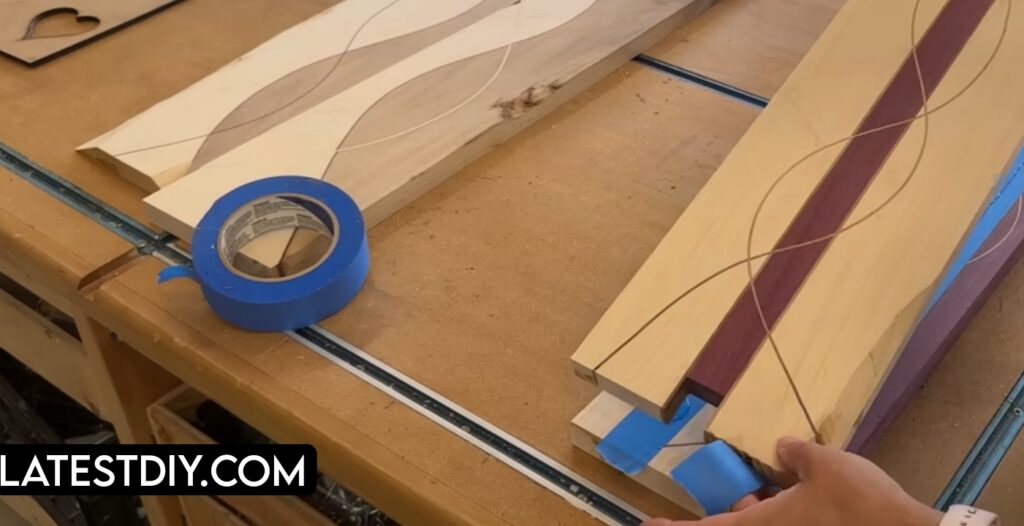
The second thing that you can do is take two boards that are different colors and place them on top of each other. I am using painters tape with some CA glue underneath to attach them together temporarily.
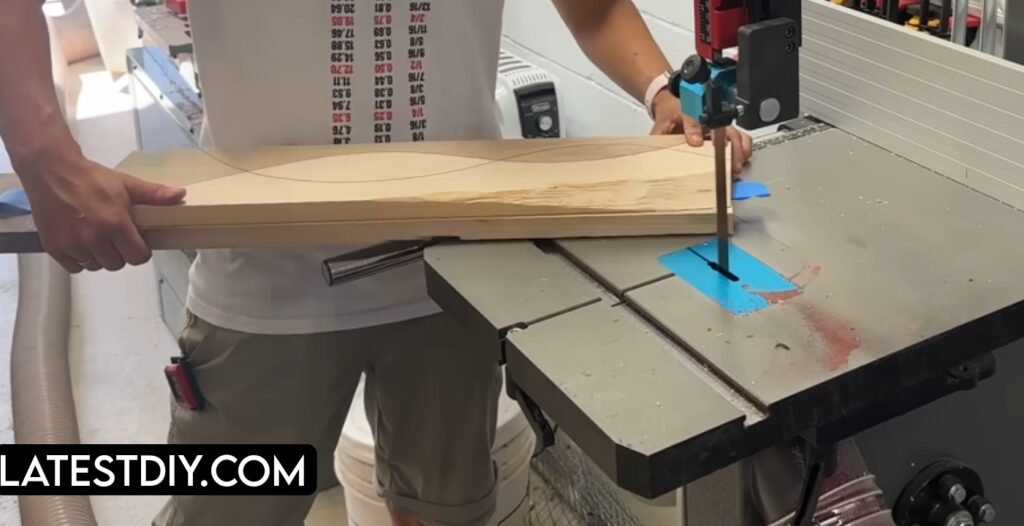
Then the boards are ready to go over on the band saw where we can cut a nice groove.
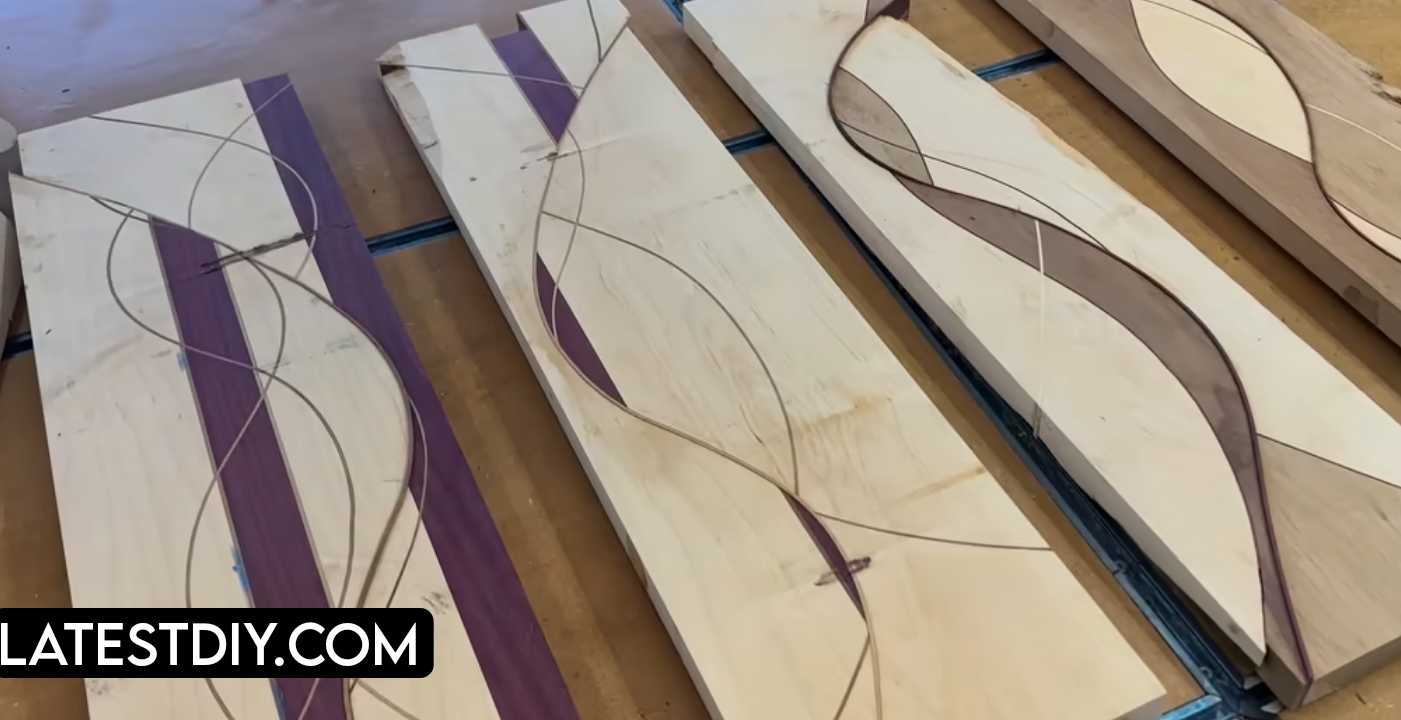
Creating the First Swirl
I like to trace a swirl on the boards as a guide to follow. It does not have to be exact but it is helpful for knowing when to turn the board when you are on the band saw.
Once you start the cut you want to commit to it. Do not stop halfway through. Just go with the flow and get a nice swirl even if it is a little different from what you drew.
With the first cut done I gently sand the inside before removing the painters tape.
Now comes the interesting part. The boards are flipped around and now we have two new pieces with two different types of woods.
Adding the Third Wood Piece
This is where things get fun. When you take a third piece of wood and place it inside the groove that is when the magic starts happening.
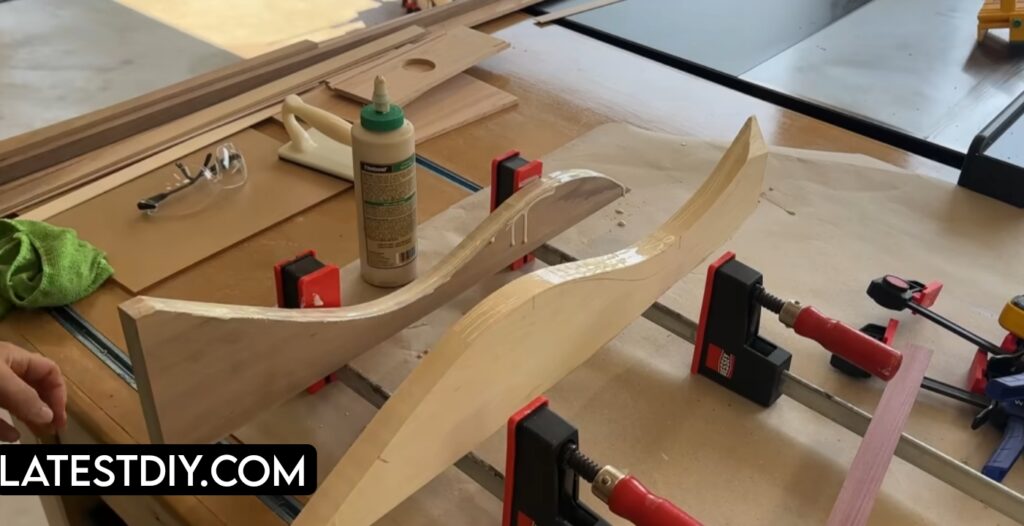
The two opposite woods are placed on each side and the third strip goes in the middle. Glue is applied to both sides and then clamps are used to squeeze everything together.
It is better to have a little bit too much glue than too little.
One thing to remember is that when you start creating bends you actually need a longer piece of wood because the curve requires more distance.
Glue Up Process
We are now ready to do the first glue up. I am using one clamp for one glue up. I do not recommend using the same clamps for multiple pieces because there is too much going on with the curves.
Before gluing I made some marks in a few different places so that I remember the alignment. Once glue is applied to both sides the inlay strip is placed in the middle and the clamps are tightened.
During this process I use tightbond three because it is waterproof and it also has a longer opening time which is helpful for these trickier glue ups.
Before tightening the clamps completely it is important to check the alignment marks. Once everything looks correct the clamps can be tightened and the boards are left to dry.

Flattening the Boards
After removing the boards from the clamps one important step is making sure that one side of the board is completely flat.
If the board is not flat or if it is wobbly then it needs to be flattened before continuing.
The boards can be taken over to a jointer to get one side nice and flat again. If a jointer is not available a drum sander or even a hand plane can be used.
Every time a wave is added a little material needs to be removed in order to maintain a flat surface.
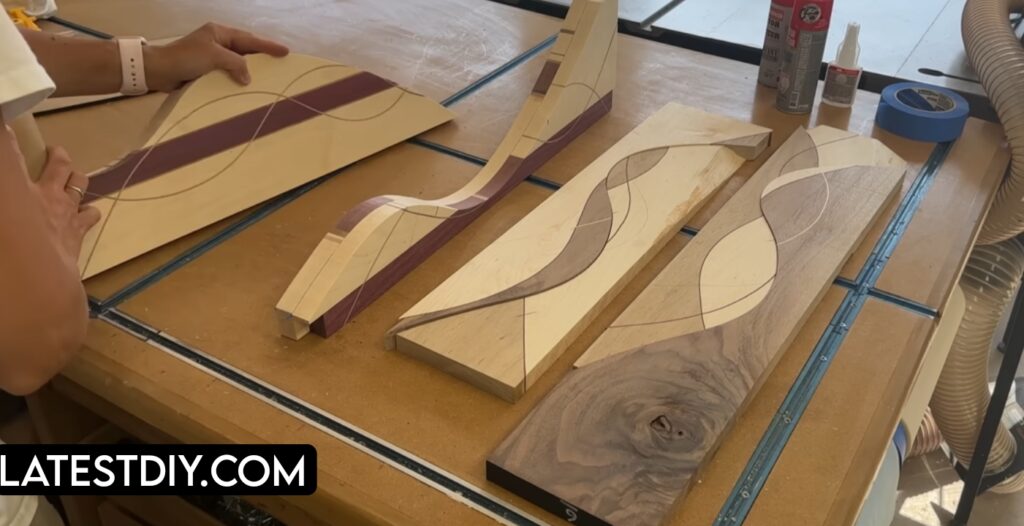
Adding More Waves
Once the first swirl or wave is added it becomes a personal decision whether to stop or continue.
The more times you repeat the process the more dramatic the wave becomes.
To create another wave the same steps are repeated. A new swirl line is traced and the board is cut again on the band saw. After cutting another strip is inserted and the boards are glued and clamped again.
Because of drying time this process usually takes several days.
Tips for Best Results
Tip number one start with the thickest boards that you can get and make one side flat before starting.
Tip number two have all of your clamps ready including a quick clamp because it makes glue ups much easier.
Tip number three cut the inlay strips longer than your main boards otherwise the weave will not be long enough.
Tip number four keep extra inlay strips ready because they can break when you start your weave.
Tip number five wipe off excess glue five to ten minutes after each glue up.
Tip number six use a minimum of three contrasting woods for the greatest visual effect.
Tip number seven do not rush. Each weave needs at least twenty four hours for drying before the next step.
Finishing the Boards
After several waves and glue ups the boards begin to look complete. At this stage the boards are flattened again using a jointer and planer so that both sides are smooth and straight.
Once the boards are flat they can be shaped using a template.
After shaping the boards the edges can be rounded using a hand router.
The boards are then sanded carefully until they become perfectly smooth.
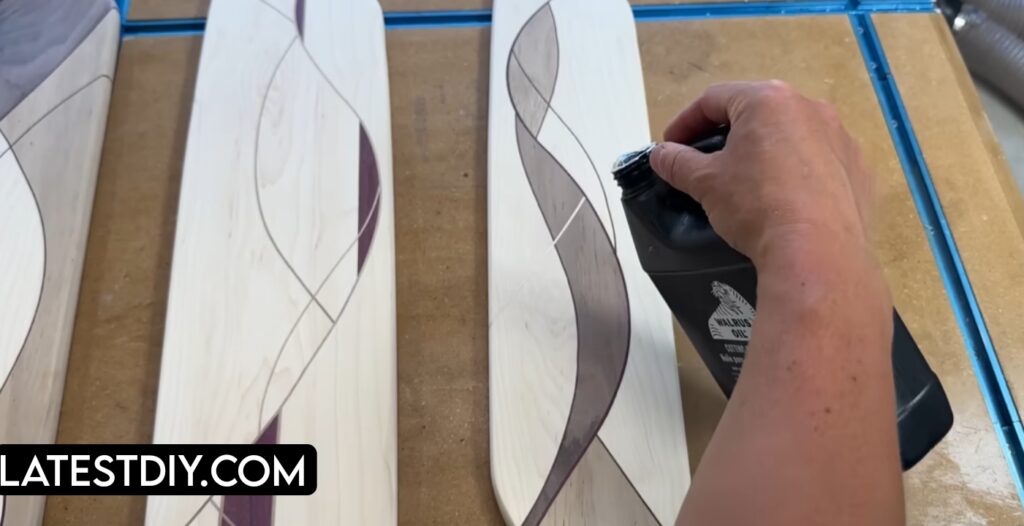
The final step is applying oil to the boards which protects the wood and brings out the natural color.
Benefits
| Benefit | Description |
|---|---|
| Unique pattern | Creates beautiful swirl and wave designs |
| Creative woodworking | Combines different woods |
| Impressive boards | Customers are amazed by the pattern |
| Artistic result | Regular boards become masterpieces |
Drawbacks
| Drawback | Description |
|---|---|
| Time required | Each glue up needs drying time |
| Multiple steps | Several cuts and glue ups are required |
| Precision needed | Boards must stay flat |
Frequently Asked Questions
What woods work best for weave boards
At least three contrasting woods such as walnut maple and purple heart work very well.
Why should boards be thick at the start
Thicker boards allow material removal during waves and flattening.
Why are thin strips used
Thin strips bend easier and create smoother waves.
Why must one side stay flat
A flat surface ensures better results when cutting the next swirl.
How long should glue dry
Glue should dry for about twenty four hours.
Can smaller boards be used
Yes smaller boards will still work.
Why keep extra strips
Strips can break during bending.
What creates the swirl pattern
The swirl comes from cutting curves and inserting contrasting strips.
How many waves can be added
The process can be repeated multiple times depending on the pattern.
Why do customers like these boards
Because the final boards look complex and artistic.
Conclusion
After several waves glue ups sanding and finishing the boards slowly transform into beautiful woven patterns. What started as regular boards becomes something unique and artistic.
Customers often see these boards and they are amazed. They think that you are some sort of wood magician being able to do this to wood.
But the truth is that it just requires time patience and a fun combination of woods.
My Opinion
When customers see these boards they often think that creating them must be extremely difficult. But once the process is understood it becomes clear that the real secret is patience preparation and a combination of woods.
Regular boards can become incredible swirled masterpieces when each step is followed carefully and when the waves are created one step at a time.
I’m Shubham, a professional carpenter with 11 years of experience in the craft. I specialize in turning high-quality wood into custom furniture, durable cabinetry, and precise structural work. For me, woodworking isn’t just a job—it’s about building things that last a lifetime


